Need an electric gate opener in River Oaks, TX? Use this smart checklist from JB Fences to plan, pick, and install the right system for your home.
Have you ever sat in your car at the end of a long day, waiting for your gate to slide open? Magic, right? But getting to that point takes a bit of planning. An electric gate opener isn’t just a motor you slap onto your existing gate and call it done.
We’ve helped a lot of folks in River Oaks set up their gate systems, and we’ll tell you straight up: the people who plan ahead always end up happier with the final result. So we put together this checklist to walk you through every step. No skipping ahead.
If you’re thinking about hiring JB Fences for your gate project, this guide will save you time and probably some money too. Let’s get into it.
Why a Checklist Matters Before You Start
Most people think about gate openers the wrong way. They see a cool gate online, get excited, and call someone to install it. Then halfway through, problems show up. The driveway slopes too much. The power source is too far. The motor isn’t strong enough for the gate weight.
A solid checklist stops these issues before they cost you money.
A 2023 industry report from the American Fence Association found that around 35% of gate opener installs in the U.S. need rework within the first two years because of bad planning. That number drops to under 8% when homeowners follow a clear planning process before buying anything.
So yeah, a checklist isn’t extra work. It’s the work.
Step One: Know Your Gate Type
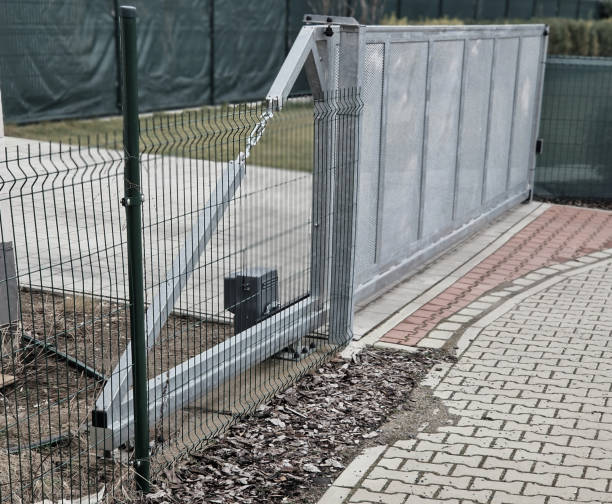
Before anything else, look at your gate. Is it a swing gate or a slide gate? This matters more than you’d think because each type needs a different kind of opener.
Swing gates open like a door. They need an arm-style motor that pushes or pulls the gate. Slide gates roll along a track. They need a rack-and-pinion motor that grabs onto teeth along the gate edge.
You also need to check:
- Gate weight (in pounds)
- Gate length (how far it travels)
- Gate height
- Material (wood, iron, aluminum, vinyl)
Write all this down. You’ll need it when picking a motor.
Quick Look at Common Gate Types
Here’s a basic chart we share with our River Oaks clients:
| Gate Style | Best Motor Type | Average Gate Weight |
| Single Swing | Arm operator | Up to 850 lbs |
| Dual Swing | Two arm operators | Up to 850 lbs each |
| Slide Gate | Rack and pinion | Up to 1,200 lbs |
| Cantilever Slide | Heavy-duty slide motor | Up to 2,000 lbs |
| Vertical Lift | Hydraulic lift motor | Custom load |
Most homes go with a single swing or dual swing setup. Bigger properties sometimes use slide gates.
Step Two: Check the Power Source
Your gate opener needs power. Sounds basic, right? But this trips people up all the time.
You have two main options. The first is hardwired power, which means running an electric line from your home to the gate. This gives steady, reliable power but costs more upfront because of trenching and wiring.
The second is solar power. Solar panels charge a battery that runs the motor. Great for homes where the gate is far from the house. But you need enough sun hitting the panel each day, and the system slows down in cloudy weeks.
For most River Oaks homes with mature trees and shaded driveways, hardwired power works better. If you’re going for Expert Electric gate opener installation in River Oaks, TX, ask your installer about the best power setup for your spot.
Step Three: Think About How You’ll Open It
This is the fun part. How do you want to control your gate?
The basic options are:
- A handheld remote (like a garage door clicker)
- A keypad mounted near the driveway
- A phone app over WiFi
- A card reader or fob
- A vehicle sensor that opens the gate as you drive up
Most homeowners pick two or three of these. We usually suggest a remote plus a keypad. The remote handles daily use, and the keypad lets visitors or family members get in without bothering you.
Real quick story. Last summer we installed a gate in River Oaks for a family with three teenage drivers. Mom didn’t want to give everyone a remote because they kept losing them. So we set up a keypad with personal codes for each kid. Now if a code gets shared with the wrong friend, she can change just that one code in 30 seconds.
Step Four: Plan for Safety
This part isn’t fancy, but it matters. Electric gates are heavy and move with force. Without proper safety gear, they can hurt people or damage cars.
Your checklist should include:
- Safety sensors (like photo eyes that stop the gate if something blocks it)
- Auto-reverse feature (gate stops and backs up if it hits anything)
- Warning lights or sounds when the gate is moving
- An emergency manual release in case of power loss
A 2024 safety study from the International Door Association showed that homes with full safety sensor setups had 92% fewer gate-related injuries than homes with basic openers. That’s a big difference.
We never install a gate opener without these features. Some cheap installers skip them to save costs. Don’t let that happen at your home.
Step Five: Pick the Right Installer
Honest truth here. You can buy a great motor and still get a bad install if the wrong person does the work. The motor needs to be aligned right, the wiring needs to be done to code, and the settings need to match your specific gate.
Look for installers who:
- Have done at least 50 gate installs
- Carry proper insurance and license
- Offer a written warranty on labor
- Use parts from known brands like LiftMaster, FAAC, or DoorKing
- Will come back for free adjustments in the first few months
Ask for photos of past jobs in your area. A good company is proud to show their work.
Step Six: Plan for Maintenance
Your gate opener will need some care over the years. Lubricating moving parts, tightening hardware, checking battery backup, and testing safety sensors. Most of this can happen once or twice a year.
Some installers offer maintenance plans. These usually run $150 to $300 per year and cover everything. For most homes, that’s worth the peace of mind because catching a small problem early saves you from a $1,500 motor replacement later.
Conclusion
An electric gate opener can change how you feel about coming home every day. No more getting out of the car in the rain. No more worrying about who can walk up your driveway at night. But getting it right takes a bit of upfront thought. From gate type to power source to safety sensors, every step on this checklist matters. We’ve been helping families across River Oaks set up gates that work the first time and keep working for years. If you want a team that handles Best Affordable driveway gate installation in River Oaks, TX with honest pricing and quality parts, give us a ring.
FAQs
How long does it take to install an electric gate opener? Most installs take one full day for a standard swing or slide gate. Bigger projects with new wiring or solar setups can stretch to two or three days. We walk through the timeline with you before starting any work so you know exactly what to plan for.
Can I add an electric opener to my existing gate? Yes, in most cases we can add a motor to a gate you already have. Your current gate needs to be in good shape with solid hinges and no warping. If the gate is too heavy or worn out, we’ll let you know before quoting the job.
What happens if the power goes out? Every quality gate opener has a manual release that lets you push or slide the gate by hand. Most also come with a battery backup that keeps the motor running through short outages. We test both features during install so you know how to use them.
How much does an electric gate opener cost in River Oaks? Costs range from $1,500 for a basic single swing setup to $6,000 or more for heavy slide gates with smart controls. The final price depends on gate size, motor brand, and any extra features like keypads or solar power. We give a free quote after looking at your gate.
Do I need a permit for a driveway gate in River Oaks? Some River Oaks neighborhoods require a permit, especially in HOA-controlled areas. We help with the paperwork and check local rules before any work begins. This step usually adds a few days to the timeline but saves headaches later.